
Using the select button
In the shift form, click the Select button next to the Support Worker field.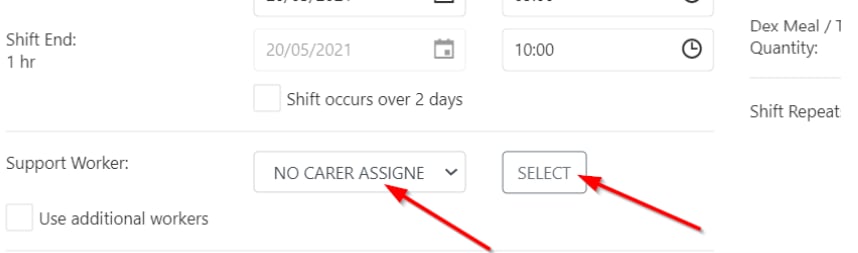
- Compliant with relevant requirements
- Not already rostered on another shift at that time
- Available on the day or at the time of the shift
- Preferred by the client (highlighted), while excluding non-preferred workers
Filtering and searching
The select window provides several ways to find the right worker: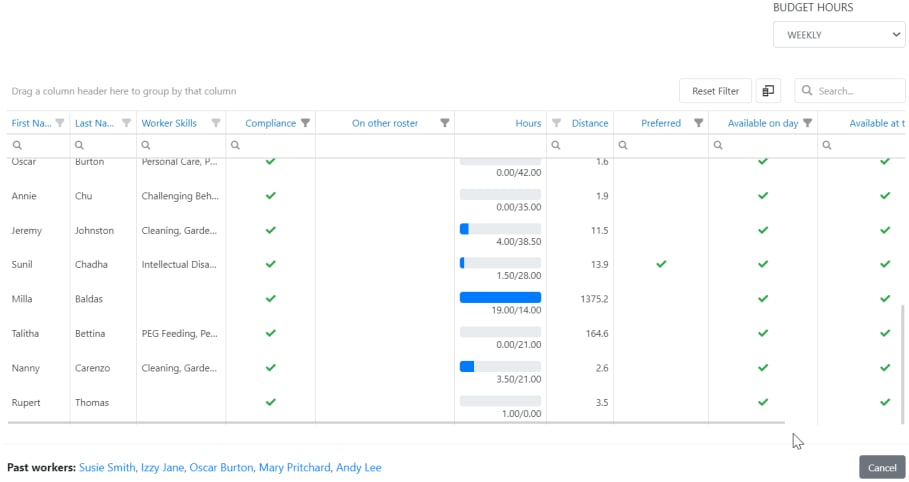
Multiple workers
If you need to assign more than one worker to a shift, tick Use additional workers in the shift form. This lets you assign up to four workers to one client for the same shift.Running into issues?
See Scheduling troubleshooting for common errors and fixes.Related articles
Creating new shifts
Set up a client roster and create individual shifts
Conflict management
Identify and resolve shift conflicts
Roster invitations
Send shift invitations to available workers